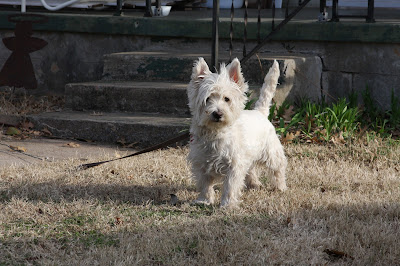
This is the tutorial of how to turn this:
 |
| Our neighbor's cute little guy |
Cute, right?
Let me start this out by saying I am a wordy person, so please forgive me if you want to pull your hair out by the end of this thing!
First you need to download Gimp which is the program I used to create my silhouette photo. It's free and similar to Adobe Photoshop but without the hefty price tag! Here is the link to the download.
Okay, so after you are done downloading Gimp, the next thing you need to do is open the photo you are going to make the silhouette with.
First, go to FILE, then OPEN, then just go to the specific file where you keep your photos.
I chose this photo of my kids, Jack and Chula. :)
Your photo will be called your background layer.
Your screen should look something like this:
If the Toolbox and Layers windows are not already on your desktop, you can find these under Windows> Dockable Dialogs.
Now we will create the layers for out images. I have two dogs in my photo so I am going to create a layer called fill, a layer called Jack, and a layer called Chula. This will give me a total of 4 layers including the original background layer. You will create these layers by selecting the small, blank piece of paper in the bottom left corner of the layers window. See that squiggly pink arrow pointing to that piece of folded paper in the corner? Click that. :)
Next, Increase the zoom of your photo. You will find the zoom option under the heading View> Zoom. I would suggest zooming in to at least 200%. This will make it easier to outline the little details of your image.
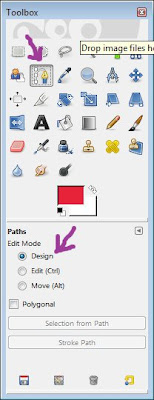
Now comes the super fun part... well, we can pretend it's fun. Select the path tool on the Toolbox window. Make sure design is selected under the edit mode. See the purple squiggly arrows pointing to the path tool and design under the edit mode?
Like this:
This is probably the most time consuming part of this project... Outlining. You will use the path tool to outline the people/ kids/ furry ones in your picture by placing little dots all around the outside edge of the image. The closer together the dots are, the more detailed your silhouette will be.
*Helpful Hint* If you do not like where you placed one of the marker dots, you can press CTRL + Z and it will delete your last action.
Once you have placed little dots all around the outside edge of your image and you come back to the place where you began in the first place, you will press Enter. This will close your outline and the image outline will start moving.
TROUBLESHOOTING: It's possible that you may have lines which cut through your image. This most likely means one of the markers you laid is not lining up properly. This is a very annoying issue but you can fix it with some adjustments. If you run into this issue, you will need to select Edit under the Paths Edit Mode Heading in the Toolbox window. Then move the little marker dots around where the crazy dissecting lines end on the outer edge of your image. Once you think you have it fixed, press Enter. If the crazy dissecting lines disappear, CONGRATS, you fixed it!! If they are still there, try, try again. If you did not run into this issue, lucky you! Keep going!
Your image should look something like this after you finish outlining:
Now click on Selection From Path under the Paths Edit Mode in the Toolbox window. Next, chose the bucket fill icon in the Toolbox window (it looks similar to the one you see in Paintbrush). Make sure the FG is selected under Fill Type and Fill Whole Selection is selected under the Affected Area in the Toolbox window. Yay!! We made it to the fun part!! You get to select the color to fill your image with! I chose yellow for Jack.
Next, you will need to select the layer of any additional images you want to outline in your photo. The next image I need to outline is named Chula. You will repeat the same dot-to-dot process for each additional image but REMEMBER to click on that image's layer first!
Here's Chula.. pink of course!
Aren't you sooo glad the dot-to-dot is over with? I am! Were almost done!!
Select the Fill layer from the Layers window. Now, click Select > None from the toolbar at the top of the page. Select the bucket fill icon and select the color you would like your background to be. Make sure the Fill Whole Selection is selected under the Affected Area in the Toolbox window. Click somewhere on the background of your image and POOF!!!
You get this!
Don't forget to save all your hard work!! Enjoy!


