Friday, June 3, 2011

Not Match-y Match-y!!

So, when all of this wedding planning started, I knew I didn't want everything to match perfectly. I know that may sound crazy but for the casual, laid back feeling I am looking for, I think it will be perfect.
The most daunting task to date has been deciding what to ask the bridesmaids to wear. I know, this would seem like something super easy to most but I think it turned into the gray hair inducing kind of stress no one wants to deal with. Mostly because I really, really did not want to choose a dress that would be something no one would ever want to wear again. I also wanted to keep everyone's budgets in mind. You may or may not know this wedding is being done on an insy wensy budget so my girls will unfortunately have to fork out the funds for their own pretty dress.
Anyway... I ended up not making a huge decision on the bridesmaids dresses and just asked them to please find a yellow dress, above the knee, and some neutral shoes, preferably wedges or flats. I also asked them to bring their boots.
So, you may be thinking... okay that is not going to look cute at all. I swear I did some research on this before I bailed on the important bridesmaid's dress decision though and it will look great!

Take a look at what I found out there on the world wide web:


See??! So-darn-cute! And minimal decision making all in one! Love it!


Monday, March 21, 2011

The Silhouette Tutorial

Alright...it's the tutorial you've all been waiting for! Or maybe you haven't but I am posting it anyway!

This is the tutorial of how to turn this:
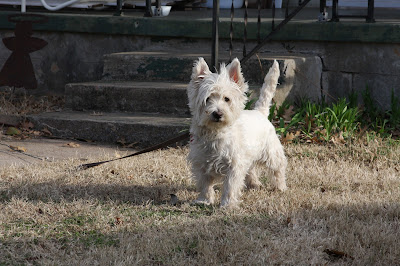
Our neighbor's cute little guy
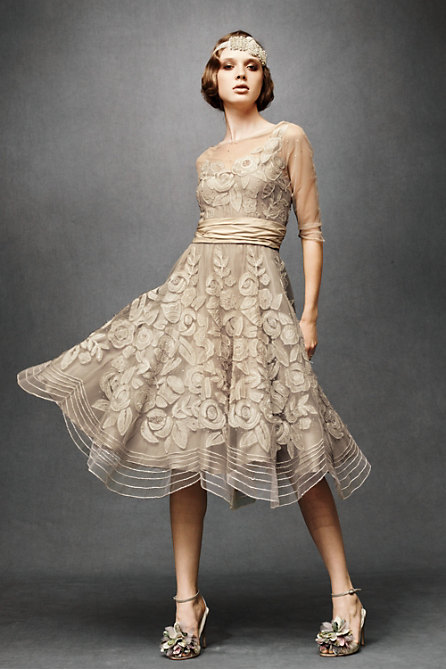
Into this:

Cute, right? 

Let me start this out by saying I am a wordy person, so please forgive me if you want to pull your hair out by the end of this thing! 

First you need to download Gimp which is the program I used to create my silhouette photo. It's free and similar to Adobe Photoshop but without the hefty price tag! Here is the link to the download.


Okay, so after you are done downloading Gimp, the next thing you need to do is open the photo you are going to make the silhouette with. 
First, go to FILE, then OPEN, then just go to the specific file where you keep your photos. 

I chose this photo of my kids, Jack and Chula. :) 
Your photo will be called your background layer.

Your screen should look something like this:


If the Toolbox and Layers windows are not already on your desktop, you can find these under Windows> Dockable Dialogs. 

Now we will create the layers for out images. I have two dogs in my photo so I am going to create a layer called fill, a layer called Jack, and a layer called Chula. This will give me a total of 4 layers including the original background layer. You will create these layers by selecting the small, blank piece of paper in the bottom left corner of the layers window. See that squiggly pink arrow pointing to that piece of folded paper in the corner? Click that. :)


Next, Increase the zoom of your photo. You will find the zoom option under the heading View> Zoom. I would suggest zooming in to at least 200%. This will make it easier to outline the little details of your image. 

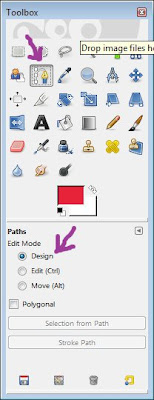
Now comes the super fun part... well, we can pretend it's fun. Select the path tool on the Toolbox window. Make sure design is selected under the edit mode. See the purple squiggly arrows pointing to the path tool and design under the edit mode?
Like this:

This is probably the most time consuming part of this project... Outlining. You will use the path tool to outline the people/ kids/ furry ones in your picture by placing little dots all around the outside edge of the image. The closer together the dots are, the more detailed your silhouette will be.
*Helpful Hint*  If you do not like where you placed one of the marker dots, you can press CTRL + Z and it will delete your last action. 
Once you have placed little dots all around the outside edge of your image and you come back to the place where you began in the first place, you will press Enter. This will close your outline and the image outline will start moving. 
TROUBLESHOOTING: It's possible that you may have lines which cut through your image. This most likely means one of the markers you laid is not lining up properly. This is a very annoying issue but you can fix it with some adjustments. If you run into this issue, you will need to select Edit under the Paths Edit Mode Heading in the Toolbox window. Then move the little marker dots around where the crazy dissecting lines end on the outer edge of your image. Once you think you have it fixed, press Enter. If the crazy dissecting lines disappear, CONGRATS, you fixed it!! If they are still there, try, try again. If you did not run into this issue, lucky you! Keep going! 

Your image should look something like this after you finish outlining:

Now click on Selection From Path under the Paths Edit Mode in the Toolbox window. Next, chose the bucket fill icon in the Toolbox window (it looks similar to the one you see in Paintbrush). Make sure the FG is selected under Fill Type and Fill Whole Selection is selected under the Affected Area in the Toolbox window. Yay!! We made it to the fun part!! You get to select the color to fill your image with! I chose yellow for Jack.


Next, you will need to select the layer of any additional images you want to outline in your photo. The next image I need to outline is named Chula. You will repeat the same dot-to-dot process for each additional image but REMEMBER to click on that image's layer first! 

Here's Chula.. pink of course! 

Aren't you sooo glad the dot-to-dot is over with? I am! Were almost done!! 

Select the Fill layer from the Layers window. Now, click Select > None from the toolbar at the top of the page. Select the bucket fill icon and select the color you would like your background to be. Make sure the Fill Whole Selection is selected under the Affected Area in the Toolbox window. Click somewhere on the background of your image and POOF!!! 
You get this!


Don't forget to save all your hard work!! Enjoy!  


Thursday, March 3, 2011

Save Our Date!

I finally decided to tackle some wedding-ness after work the other night! Aren't you surprised?? I'm not just talking about what I'm going to do?? Haaaha!


I only managed to whip up 4 of these sweet little reminder magnets but I am, non-the-less, quite smitten. :) Now our family and friends will think sweetly of us every time they reach in the fridge for a snack!
I will definitely need the assistance of my lovely bridesmaids to create another billion or so but hey, it's a start! I found this cute little idea on ProjectWedding.com (tutorial included in link) and thought it would work just perfectly to let our guests know that were finally gettin hitched! Woo Woo! I did however, customize it to my liking and ever-developing theme by using burlap material for the hearts and a turquoise colored ribbon. These would be super cute for just about anything and maybe even sweet party favors too!

Friday, February 18, 2011

Lookie What I Made!

Our first family silhouette!


I managed to make my first silhouette out of a photo by using GIMP which is totally F-R-E-E and a lot like Photoshop!! It took me a little while to get the hang of it but I think my first try was a success! Let me know what you think!! You will probably be seeing a bunch more of these!

I call this one Granny Smith.

Really, the possibilities are endless! I will post a silhouette tutorial soon so check back often!!

EEK! If I could, I totally would!

Wear this dress to marry my sweety!
Tulle Era Dress
For the mere price of $2,600... which is almost our entire wedding budget.

Has anyone seen these a-maz-ing dresses from BHLDN??? They are so perfectly perfect in every way!
You must, must, must go check them out!
One of each? Yes please!

Wednesday, February 16, 2011

It's gonna be a Hoedown (repeat) Throwdown (repeat)!

Just thought I would share some images of the beautiful Harn Homestead where we will be hosting our nuptials in about 7 months! And although we may not be able to out do the Miley Cyrus rendition of the Hoedown Throwdown, I believe it will be super fabulously fun!


Entrance

I'm thinking of having our wedding right below this beautiful tree!

View of the Oklahoma State Capital

The Cedar Event Barn

Monday, February 14, 2011

The Most Perfect Rose-ie Wedding Cake!!

So, I'm browsing (the web) right along the other day and what do I come across??

DIY Rose Wedding Cake

A beautiful DIY wedding cake on ProjectWedding.com that was totally meant for our perfect day! I love it so much and even if we aren't going to make it ourselves (seeing as how we might be a little busy in the last few days before our wedding) it should still be something we can save quite a bit of money on! How perfectly sweet would this cake be sitting on a pink cake stand with tons of fluffy little cupcakes surrounding it? I think something like 'oops- I just jumped into Willy Wonka's chocolatey river' kind of sweet. Applause for the idyllic scene!

Friday, February 4, 2011

The Sweet Pitter Patter...

A new little one is on their way to us via my cousins Jess and Vince! YAY for babies!!!!! They already have a super adorably sweet 2 year old and she will now be a big sista! So I was thinking I really need to get a head start on my gift to the new sweet one (because we all know that I am a terrible procrastinator) especially with the little one's due date being right around our wedding! I'm feeling a little inspiration coming on but I may need some help... I really want to make something totally unusual and special.
So far Im really liking these:


I know... super sweet huh?

**Update: 2-14-2011**
I have found the need to edit this post and my thinking that "sweet ones" is not a term totally reserved for little baby girlies. So for the sweet baby boy-ies (that doesn't work as well huh?) I have found:

Little Button Loafers Sizes - Newborn, 3 Months, 6 Months and 9 months

Hee Hee! They're kinda grandpa-gone-baby, right? So cute! I love 'em! And I love little sweet baby boy-ies!

Wednesday, February 2, 2011

My name is Leanette and I'm a magazine-a-holic

So, I've been snowed in for two days...the first, 2/1/11, being my big 26th bday.

I have swept with a broom and a vaccuum, done every load of laundry I was able to find around the house, and even re-stuffed my duvet cover. I finally decided to tackle my multiple piles of magazines throughout the house. It's not something I'm proud of. I love magazines. I have tons...they give me inspiration for my someday projects and it is extremely difficult for me to part with them. I'm cursed. But it's time they stop taking up precious space in our *around* 900 sq. ft. of sweet bliss.

Please tell me I'm not the only one with this alternative, expensive addiction...

Thursday, January 27, 2011

Awww... no time for home improvements, well kind of

So, last weekend was too crazy to pull trim off the walls or paint a single thing BUT, good news! We did take our bed apart so now we are sleeping on our mattress and boxsprings... on the floor. :)
It's great! See, we had this huge monstrocity of a bed which made getting into the bed quite difficult for my dog-ter (which is just like a real daughter- only a dog). She has been limping more than usual lately and I just know it has something to do with the giant bed. So it's outta there (and in the guest room)! We are now in the super fun process of trying to pick out a lovely headboard/ low profile bed and Im super excited about that! Something like this Linear Queen Bed from JCPenney. Pretty slick huh?

What do you think??

Friday, January 21, 2011

Oooohhh Friday

So it's Friday here in the not-so-sunny Oklahoma! I'm totally ready for this weekend... okay not totally ready but I will be later today. Slaving away at work all day leaves little time to catch up on all of my little projects I have the best intentions of finishing. Saturday will be full of family fun but stay tuned for Sunday-funday! It will be a throughly exciting day of pulling ancient trim off the guest bedroom/ office room's walls and hopefully at least picking out a new paint color! Pictures will be included... you don't wanna miss this! :)

Thursday, January 20, 2011

Life As We Know It

So, I thought it would be helpful of me to introduce you to my little family. :)

Here we are in a sweet little park right off of Main Street in Yukon. We live about 2 blocks from here. :)

And here we are with our crazy pups on the porch of our (nieces) miniature Victorian house in our backyard. Yes, we did purchase this home based on the super cute playhouse in the dog-friendly backyard. :)


My little piece of paradise consists of my lovely fiance, Raf, and my two adorable pooches, Chula and Jack. We moved to Yukon, OK in October of 2009 after purchasing our first home together. It is (more recently) a work in progress. After living here for nearly a year and a half and not doing much to make it our own, we are now in the process of working out our ideas (and differences) and making some real progress towards something beautiful! Hopefully, you will find our journey inspirational in that it is totally possible to motivate the less-than-excited into completing some very useful and wonderfully comforting home projects.

I think I should include that Raf and I are recently engaged (woo!) after "dating" for what seemed to be longer than most peoples relationships these days. We are planning a mostly DIY wedding at a, so far, undecided location. The only thing that has been decided is who is playing the roles of the groom and the bride.
(Awwwww)